I only had about 5 hours to get out for a quick hunt on this particular day. With the winds being air gun manageable, it was time for my new CrosMods Disco .22 to get in some shooting time. I've finally settled on the JSB Exact 15.9 grain domes to be the guns pellet of choice. There aren't very many airguns were the Exacts DON'T perform. My CrosMods Discovery is no exception:
I wanted to get an early start to make the most of my short day. When you beat the sun up and get on the road early enough, you will be fortunate to see sites like these. Ahhhhh...the SUNRISE:
As usual upon arriving at one of my shooting locales, i recheck zero to make sure the gun is still sighted in from the last outing and to my pleasant surprise it still was very close to Point of Aim. Gotta love quick sight in sessions. I then grab a handful of JSB pellets and refilled my gun back to 2000 psi, locked my truck and began to scour the desert floor in search of some California Black Tailed Jack Rabbits. It wasn't long until i ran across my first Jack sitting under a desert creosote shrub. I lasered him at exactly 52 yards and surprisingly, i did not spook him. I quickly set my CM22 (the air rifle) on my shooting mono-pod and set the video camera to record. I calmly placed the cross hairs center mass on the rabbit head as he faced me and then I gently begun to squeeze the trigger, and VOILA...my first Jack of the day at 52 yards:
I then begin to hike in search for more jack rabbits. Because of the hot weather, i did not see as many as i normally do nor did i want to walk too far from my truck. So i searched for another 1/4 mile or so with no luck, and i decide to go back to my vehicle and drive to my Ground Squirrel location. About 150 yards from my truck, i spot movement and it was another rabbit about to make his way up the side of a hill that i was walking alongside. As he trotted off i thought, "hear he goes...up the side of the mountain and down the back side.....HE'S GONE!". And to my surprise, he only sprinted off a couple of yards and stopped, and sat up on his hind legs to catch a glimpse of what i was. That would be his mistake. Again, i set up my shooting sticks and took aim all the while turning on my camera and hitting record again and placed the crosshairs center mass of the rabbits head. Being as the rabbit was 64 yards away, i knew the shot would fall low and penetrate the chest cavity striking the heart region. A gently squeeze of the trigger again and BOOM....rabbit number 2:
So now i head back to my truck to take a look at the time and i had decided that it was time to move on to hunting a couple of ground squirrels and try and get some video footage. Off i go to my ground squirrel area and upon arriving, the wind had picked up just a little and i didn't have very much time to hunt. I arrive and I quickly get out of the truck and grab all my necessities and refill the gun back up to 2000 psi again. My first squirrel would come in at a lasered 41 yards and I did not have much time to set up on him as he was skiddish. It was a cleanly placed head shot that would do that fellow in. As i walked the area, i spot another squirrel at 79 yards but i did not want to make that kind of shot cause i'm still getting used to this gun. So i stalked to right at 52 yards of the squirrel. I sat on the ground and collapsed my shooting stick to where i could place the rifle on top of it while sitting and quickly started the camera rolling. I then lasered the log the squirrel was sitting on just to verify the distance and it was again......54 yards. The squirrel was looking at me with his head turned sideways giving me the perfect shot opportunity (between eye and ear) and i decided to place the JSB right down his ear canal. Once i squeezed the trigger, i could very clearly hear the impact. The CrosMods .22 had again, done her job:
Attached is a video of the above listed shots. The video runs 2 minutes and 32 seconds. In that video, i included the last 2 ground squirrels of the day. Whats different about the shots in the video on the last squirrels is that.....I MISSED! I included the misses cause missing is a very real part of hunting and or shooting. And i'm not afraid to say or admit that i have enough video of misses that i could make a 2 hour video out of it......lol. Ok, so not 2 hours worth but enough. Whats kind of funny too is that the majority of the time that i miss, i miss very cleanly and the animals are not wounded and run down their holes to die and agonizing death. The first ground squirrel i OVERCOMPENSATED by like 2 mil-dots and the shot was to the far right. I missed the squirrel but i did manage to kill the log he was sitting on...lol. The second squirrel again, was a clean miss as i simply did not ADD enough compensation for wind doping and the shot was close but, i got no cigar. Both squirrels lived to see another day:
STAY TUNED!!
Saturday, July 30, 2011
Saturday, July 16, 2011
.308 Corsair Long Range Session (part 1 of a 4 part series)
Hey guys, and welcome to another one of my H.P.A. expeditions. On this trip and in this series, i wanted to dwelve into some BASIC long range shooting with my airguns. In this first installment, i opt to start with the .308 Corsair. A gun and bullet combo well suited for long range shooting. The gun is making roughly 240+ ft lbs and has a true bore diameter of .308". The bullets that i shoot through the gun are sized to .308" diameter and cast by myself. I have found that in my particular gun, .308' works better than bullets sized to .309". I start the day off with a simple sight in to zero the gun at 100 yards. The gun proves to be plenty accurate at 100 yards as a few bullets that i used that day printed 2 shots touching each other. The three bullets are the 135 grain Spitzer, the 148.5 gr RCBS HP and a 155 gr LEE mold Flat Point bullet. Remember, this is an airgun and not a powder burner so shot count is limited per fill. At 3600 psi, i get 4-5 shots but only the first couple are consistent in velocity and accuracy. Its the nature of a big bore airgun. You simply don't buy them to shoot 20-50+ shots off of 1 fill. You buy them for all out POWER. Lets take a look at a few targets from that day:
As you can see above, the accuracy is there.
After sighting in and getting the POI pretty close, i then set up some of the REACTIVE targets that i brought along. REACTIVE targets are basically anything that you can shoot that simply lets you know you hit it. Such as a can filled full of soda, or an aspirin tablet or a jug filled with water or even a metallic swinging target that GONGS when you hit it. I set up 2 water bottles/jugs at 91 yards and hit one with the 308 Corsair and the other with the Jack Haley 457. The targets fell easily at the shots. I then move out to 100 then 150 then 200 yards with my steel swinging target that sways when its hit with something powerful enough to make it move upon impact. At those distances i also managed to shoot a MELON and a couple of jugs filled with water. The gun/bullet combo proves to be accurate and have plenty of potential all the way out to 200 yards.
During the session which you will see in the video, my rear scope ring is not tight and the clamp manages to come slightly out of the dovetail groove on the receiver. My groups all of a sudden move upward and the gun continues to shoot a tad high for the remainder of the day. It was not till i went home that i found the issue. I reset the rear scope ring and also REPLACED the entire scope with another that i had on a gun that i don't shoot too often. So that should resolve the POI issue on the following shoots with this gun.
All in all, i am very pleased with the gun as it performed very well at distance. Probably better than i thought in the beginning even considering the scope malfunction during the making of this video. Lets go ahead and review the video and it explains the story in more detail. ENJOY:
STAY TUNED!!!
As you can see above, the accuracy is there.
After sighting in and getting the POI pretty close, i then set up some of the REACTIVE targets that i brought along. REACTIVE targets are basically anything that you can shoot that simply lets you know you hit it. Such as a can filled full of soda, or an aspirin tablet or a jug filled with water or even a metallic swinging target that GONGS when you hit it. I set up 2 water bottles/jugs at 91 yards and hit one with the 308 Corsair and the other with the Jack Haley 457. The targets fell easily at the shots. I then move out to 100 then 150 then 200 yards with my steel swinging target that sways when its hit with something powerful enough to make it move upon impact. At those distances i also managed to shoot a MELON and a couple of jugs filled with water. The gun/bullet combo proves to be accurate and have plenty of potential all the way out to 200 yards.
During the session which you will see in the video, my rear scope ring is not tight and the clamp manages to come slightly out of the dovetail groove on the receiver. My groups all of a sudden move upward and the gun continues to shoot a tad high for the remainder of the day. It was not till i went home that i found the issue. I reset the rear scope ring and also REPLACED the entire scope with another that i had on a gun that i don't shoot too often. So that should resolve the POI issue on the following shoots with this gun.
All in all, i am very pleased with the gun as it performed very well at distance. Probably better than i thought in the beginning even considering the scope malfunction during the making of this video. Lets go ahead and review the video and it explains the story in more detail. ENJOY:
STAY TUNED!!!
Tuesday, June 7, 2011
CROSMODS Discovery .22: First day in the field
I was eager as usual for this day to come. And when it did, i was as happy as a kid in a candy store. I had done my usual check of the weather and all seemed like it was gonna be pretty good. The CROSMODS Discovery 22 (aka CD22) had turned out to be such a wonderful looking rifle that i could not wait to shoot it. I won't bore you too much with EXTRA DETAIL so i will start the story of my day.
Once here, i set up my target stand along with some reactive targets that i made at home. It was not as windy up here as it was at my first location. But, it was not WINDLESS. So reactive targets it was to be. The targets included my usual array of water filled plastic bottles and some plastic Easter eggs filled with flower, 12 raw eggs sitting on golf tees, and a few balloons that i filled with water. All of these make great targets as when you hit them, you know it..lol:
By now, it was much later in the afternoon and i had decided that the gun was as sighted in as i could get it for the day without putting it on paper. After all, i was smashing raw eggs out to 66 yrds. So off to my hunting area to see how the gun would perform on live quarry. After arriving, i knew i did not have too much time...maybe and hour tops. The wind was also picking back up. After walking out into the field about 100 yards, i found this little fella perched up right in front of me about 46 yards away. He was pretty husky too. One of the biggest Ground Squirrels i had ever seen. I was actually nervous a little as this was my CD22's first potential kill. Upon the shot, i quickly heard the very audible "THWOCK" and the squirrel tightened up at the shot and dropped like a brick. It was a very well place eyeball shot:
It was getting late and i still had about a 45 minute drive back up to the main road. I packed up my gear and headed out. Upon reaching the front of the area, i spotted a big Jack Rabbit running right in front of my truck. I slowed down to see if i could spot him and he was about 85 yards aways to my left. I parked my truck and grabbed my CD22 and stalked up to what i thought might have been 45-50 yards away from him. I could still see him hiding behind the brush. I snuck around till i could clearly spot him and BOOMMMMM...the Jack fell to the CD22. The pellet landed EXACTLY were i aimed..between the eye and the ear:
All in all i had GREAT 1st Field day with my new gun. Its a blast to shoot, seems to be very accurate with a handful of pellets. But i think it really likes the .22/15.9 gr JSB Exacts. The finished gun minus the camera and camera mount in the picture weigh in at 7.8 pounds and has a OAL of 40", so it makes for a very comfortable, easy to hold steady, pointable and compact rifle. CROSMODS did a really great job on CNC machining the custom parts for the Discovery rifles. The neat looks, the quality of parts, and the overall weight make it all worth it.
Thanx for reading and watching and as usual...................................
STAY TUNED!
Lets start with a couple of pics of the gun:
Sadly, after arriving at my locale (shooting area), i found that the wind was far off from what the weathermen had predicted. They said 3 mph but, it was more like 13 mph at certain points throughout the day. But what was very nice was seeing a few jack rabbits and ground squirrels running about. That is always a sign of "IT'S GONNA BE A GOOD DAY". My 1st task at hand was to sight the gun in at 50 yards. I pre-sighted the gun in at 13 yards previously and this usually always puts me on paper when i get into the field and sight in at 50 yards. The first shot landed to the right of the bullseye about 3" and the next landed just to the left of that shot by about 3/16". I thought i was off to a decent start but, the one thing that i try not to do is sight a gun in "IN THE WIND" cause i truly have no idea of were the pellets are truly supposed to be hitting once the wind either slows down or stops all together. After taking my third shot and noticing that my paper targets were blowing off my target stand, i decided to pack it up and to move to another area and focus on hitting reactive targets instead of paper targets.
Once here, i set up my target stand along with some reactive targets that i made at home. It was not as windy up here as it was at my first location. But, it was not WINDLESS. So reactive targets it was to be. The targets included my usual array of water filled plastic bottles and some plastic Easter eggs filled with flower, 12 raw eggs sitting on golf tees, and a few balloons that i filled with water. All of these make great targets as when you hit them, you know it..lol:
By now, it was much later in the afternoon and i had decided that the gun was as sighted in as i could get it for the day without putting it on paper. After all, i was smashing raw eggs out to 66 yrds. So off to my hunting area to see how the gun would perform on live quarry. After arriving, i knew i did not have too much time...maybe and hour tops. The wind was also picking back up. After walking out into the field about 100 yards, i found this little fella perched up right in front of me about 46 yards away. He was pretty husky too. One of the biggest Ground Squirrels i had ever seen. I was actually nervous a little as this was my CD22's first potential kill. Upon the shot, i quickly heard the very audible "THWOCK" and the squirrel tightened up at the shot and dropped like a brick. It was a very well place eyeball shot:
It was getting late and i still had about a 45 minute drive back up to the main road. I packed up my gear and headed out. Upon reaching the front of the area, i spotted a big Jack Rabbit running right in front of my truck. I slowed down to see if i could spot him and he was about 85 yards aways to my left. I parked my truck and grabbed my CD22 and stalked up to what i thought might have been 45-50 yards away from him. I could still see him hiding behind the brush. I snuck around till i could clearly spot him and BOOMMMMM...the Jack fell to the CD22. The pellet landed EXACTLY were i aimed..between the eye and the ear:
All in all i had GREAT 1st Field day with my new gun. Its a blast to shoot, seems to be very accurate with a handful of pellets. But i think it really likes the .22/15.9 gr JSB Exacts. The finished gun minus the camera and camera mount in the picture weigh in at 7.8 pounds and has a OAL of 40", so it makes for a very comfortable, easy to hold steady, pointable and compact rifle. CROSMODS did a really great job on CNC machining the custom parts for the Discovery rifles. The neat looks, the quality of parts, and the overall weight make it all worth it.
Here is a video of MY FIRST DAY IN THE FIELD WITH THE CD22:
Thanx for reading and watching and as usual...................................
STAY TUNED!
Thursday, June 2, 2011
PROJECT: CROSMODS Discovery .22
Some might call it a HOBBY and others might call it a SPORT. One could even say that I COLLECT airguns. But i say, "It's an ADDICTION"...lol. Seriously though, airguns are a huge part of my life and have been since i was 9 years old. It all started with the Crosman 760 pump pneumatic. After all, it's what my uncle always had and let me shoot. Years later when i was in my mid teens, i finally got a Benjamin 392. Wow, what a gun it was and it was definitely an "upgrade" to the 760. I was in the big leagues.
Today, at 41 yrs old, i find myself coming right back to the Crosman/Benjamin family (Crosman owns Benjamin now). Recently, I bought a Benjamin Disco .22 and it's the second Crosman/Benjamin that i own. I also have the well built 2240 pistol that is highly modified and a tack driver so i expect nothing less from the Discovery. The Discovery is the first "Duel Fuel" air rifle on the market. Duel fuel means that it works off of 2 air sources. HPA or CO2. One of the attractions to this rifle for me is the fact that the rifle is a lower fill pressure than normal and is rated for 2000 psi fills with about 25-30 shots per fill.
Enter CROSMODS. These guys make custom accessories for a variety of Crosman/Benjamin airguns. You can check out their website at http://www.crosmods.com/index.html.
Since i did not have time nor did i plan on testing this gun in its stock form, i will start the story of the project. Here are a few pics of the new Disco .22:
After unboxing the gun, i was very happy to see such nice quality in an American product. The stock had very nice grain and i was surprised at how thin and light it was. The barrel and air tube bluing was deep and very well applied. I also liked the fiber optic sights on the gun. It's a nice addition and i even had time to take about 25 shots in my garage range using the open sights. Of course at only 13 yards though, the sights were dead on. The only real disappointment in the entire gun was the plastic trigger. Even though plastic, i can't form a honest "performance" opinion about it as i did not thoroughly test the gun in stock form but, the thought of anything plastic on a airgun is a turn off. So now, after doing a little shooting at paper in my garage, the next step was to refill the gun back up to 2000 psi and do a shot string. The only pellets i had on hand were the JSB 14.3 grain Express pellets. Even though i plan on tuning the gun for 18.1 gr JSB Exact Jumbos, the Express would do. All i needed was a shot string.
The numbers were as follows using 14.3 gr JSB Express pellets:
25 Shot string:
1 - 801.6 fps 6 - 812.5 11 - 840.5 16 - 848.1 21 - 848.6
2 - 798.1 7 - 824.7 12 - 843.0 17 - 849.4 22 - 842.0
3 - 801.0 8 - 831.5 13 - 842.4 18 - 859.2 23 - 840.3
4 - 811.8 9 - 824.6 14 - 844.4 19 - 845.4 24 - 842.3
5 - 812.0 10 - 830.7 15 - 849.7 20 - 847.3 25 - 840.6
This is an average of 833 fps and 22 Foot Pounds of Energy.
Now, lets also look at some other numbers from the stock Disco .22:
Weight (postal scale): 5 lbs, 0.7 ounces (empty tank), 5 lbs, 1.4 ounces (2000 psi fill)
Overall length: 39 1/2"
Trigger pull: 3 lbs, 8 ounces average
.22 caliber/24" rifled steel barrel
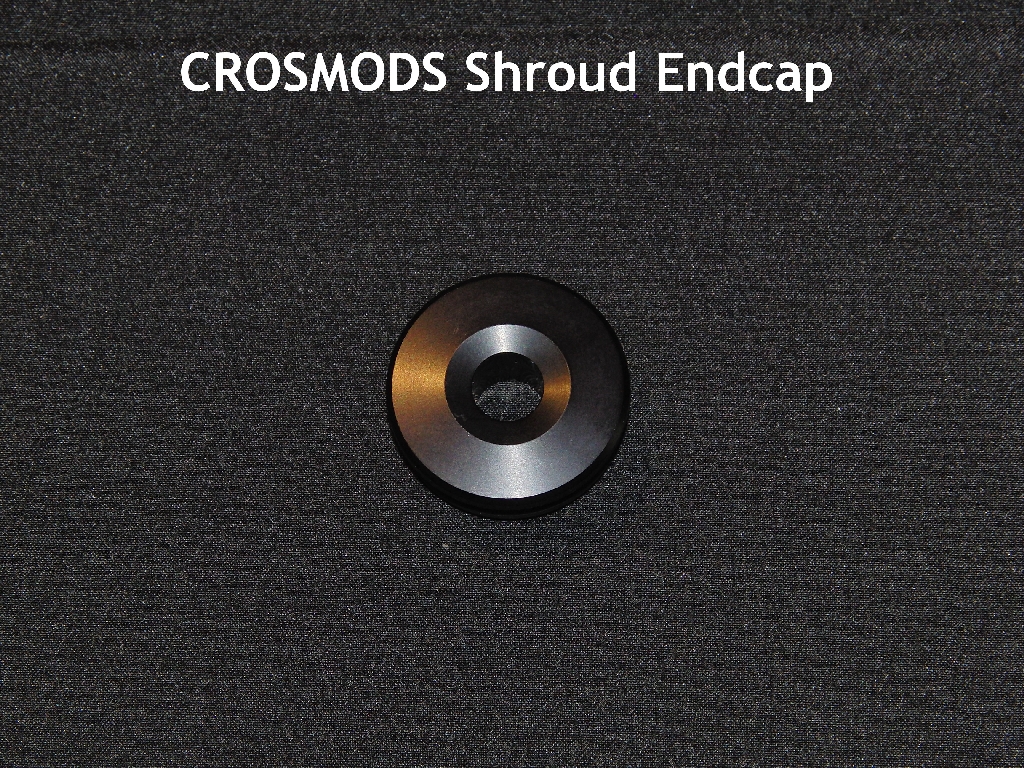
Now that i had all the info i wanted from the stock Disco, it was time to start the modification process. Let take a look at all the CROSMODS parts i purchased for the installation:
*NOTE: CROSMODS can anodize all or any of the parts in basic colors as well as CUSTOM colors.
Once assembled, and man was it fun putting this gun together, i could only sit there and smile. The gun came out looking exactly the way i wanted it too. Albeit different from the traditional wood and steel look, it was exactly what i wanted. The feel of the gun was also everything i could have hoped for. The modded gun only gained 2 lbs 7 ounces including the scope over the stock Disco. I should have weighed the CROSMODS Disco without the scope but, i can do that later. I also could have weighed the stock Disco with the same scope but, honestly, i forgot that also....lol. So the gun actually probably only gained a tad over a pound total, stock vs. modded. Lets take a look at some numbers from the CROSMODS Disco .22:
Weight: 7 lbs, 8 oz with TOTAL/a gain of over 1 pound
Overall length: 40.0" (gun has adjustable butt stock)/ a gain of 1"
Trigger pull: 2 lbs, 5 oz (has adjustable trigger)/decrease of 1lb, 3 oz
Replaced mainspring with stiffer one for more power
All o-rings in the entire gun were replaced with VITON o-rings for a better seal life span.
As I've yet to sight this gun in and run her through her paces, the power is set at 31 fpe using the 18.1 gr JSB Exact Jumbos. As I've mentioned above, these are the pellets of choice (which can change at any time) and i really wanted to focus even more on the speed of the projectile which i sought after 880 fps. This gun is also mainly for hunting and this is the beginning test phase of the rifle. Lets look at the numbers that i have so far with the 18.1 gr JSB Jumbos (880 fps target velocity):
1 - 874.6 6 - 889.4
2 - 879.1 7 - 887.6
3 - 880.1 8 - 880.6
4 - 882.6 9 - 879.1
5 - 880.2 10 - 870.7 with 1400 psi left
Again, this is all initial testing after the assembly and more field testing is required to get the gun dialed in. There are more options or ways that i could go with this gun. 1 is, the barrel (24") comes to the end of the shroud therefor the shroud is just for looks for now. I could shorten the barrel by 4" and install a baffle system into the shroud but, i would loose roughly 60 FPS. I could switch to a lighter pellet than the 18 gr JSB's like the 14.3 grain Croman Premiers to gain the speed back but, as i've said, i've got a ton of testing to do yet to this gun so, time will tell. In saying that, my end results with this rifle just could be to cut the barrel down, then install baffles, then switch to a lighter pellet at the same set velocity of 880 fps but adding a few more shot. The future will tell.
*NOTE: 880 fps is for testing/theory purposes. I will not get into that speed designation # at this time.
Here's a video of me putting the gun together. ENJOY!!:
STAY TUNED!!
Today, at 41 yrs old, i find myself coming right back to the Crosman/Benjamin family (Crosman owns Benjamin now). Recently, I bought a Benjamin Disco .22 and it's the second Crosman/Benjamin that i own. I also have the well built 2240 pistol that is highly modified and a tack driver so i expect nothing less from the Discovery. The Discovery is the first "Duel Fuel" air rifle on the market. Duel fuel means that it works off of 2 air sources. HPA or CO2. One of the attractions to this rifle for me is the fact that the rifle is a lower fill pressure than normal and is rated for 2000 psi fills with about 25-30 shots per fill.
Enter CROSMODS. These guys make custom accessories for a variety of Crosman/Benjamin airguns. You can check out their website at http://www.crosmods.com/index.html.
Since i did not have time nor did i plan on testing this gun in its stock form, i will start the story of the project. Here are a few pics of the new Disco .22:
After unboxing the gun, i was very happy to see such nice quality in an American product. The stock had very nice grain and i was surprised at how thin and light it was. The barrel and air tube bluing was deep and very well applied. I also liked the fiber optic sights on the gun. It's a nice addition and i even had time to take about 25 shots in my garage range using the open sights. Of course at only 13 yards though, the sights were dead on. The only real disappointment in the entire gun was the plastic trigger. Even though plastic, i can't form a honest "performance" opinion about it as i did not thoroughly test the gun in stock form but, the thought of anything plastic on a airgun is a turn off. So now, after doing a little shooting at paper in my garage, the next step was to refill the gun back up to 2000 psi and do a shot string. The only pellets i had on hand were the JSB 14.3 grain Express pellets. Even though i plan on tuning the gun for 18.1 gr JSB Exact Jumbos, the Express would do. All i needed was a shot string.
The numbers were as follows using 14.3 gr JSB Express pellets:
25 Shot string:
1 - 801.6 fps 6 - 812.5 11 - 840.5 16 - 848.1 21 - 848.6
2 - 798.1 7 - 824.7 12 - 843.0 17 - 849.4 22 - 842.0
3 - 801.0 8 - 831.5 13 - 842.4 18 - 859.2 23 - 840.3
4 - 811.8 9 - 824.6 14 - 844.4 19 - 845.4 24 - 842.3
5 - 812.0 10 - 830.7 15 - 849.7 20 - 847.3 25 - 840.6
This is an average of 833 fps and 22 Foot Pounds of Energy.
Now, lets also look at some other numbers from the stock Disco .22:
Weight (postal scale): 5 lbs, 0.7 ounces (empty tank), 5 lbs, 1.4 ounces (2000 psi fill)
Overall length: 39 1/2"
Trigger pull: 3 lbs, 8 ounces average
.22 caliber/24" rifled steel barrel
Now that i had all the info i wanted from the stock Disco, it was time to start the modification process. Let take a look at all the CROSMODS parts i purchased for the installation:
*NOTE: CROSMODS can anodize all or any of the parts in basic colors as well as CUSTOM colors.
Once assembled, and man was it fun putting this gun together, i could only sit there and smile. The gun came out looking exactly the way i wanted it too. Albeit different from the traditional wood and steel look, it was exactly what i wanted. The feel of the gun was also everything i could have hoped for. The modded gun only gained 2 lbs 7 ounces including the scope over the stock Disco. I should have weighed the CROSMODS Disco without the scope but, i can do that later. I also could have weighed the stock Disco with the same scope but, honestly, i forgot that also....lol. So the gun actually probably only gained a tad over a pound total, stock vs. modded. Lets take a look at some numbers from the CROSMODS Disco .22:
Weight: 7 lbs, 8 oz with TOTAL/a gain of over 1 pound
Overall length: 40.0" (gun has adjustable butt stock)/ a gain of 1"
Trigger pull: 2 lbs, 5 oz (has adjustable trigger)/decrease of 1lb, 3 oz
Replaced mainspring with stiffer one for more power
All o-rings in the entire gun were replaced with VITON o-rings for a better seal life span.
As I've yet to sight this gun in and run her through her paces, the power is set at 31 fpe using the 18.1 gr JSB Exact Jumbos. As I've mentioned above, these are the pellets of choice (which can change at any time) and i really wanted to focus even more on the speed of the projectile which i sought after 880 fps. This gun is also mainly for hunting and this is the beginning test phase of the rifle. Lets look at the numbers that i have so far with the 18.1 gr JSB Jumbos (880 fps target velocity):
1 - 874.6 6 - 889.4
2 - 879.1 7 - 887.6
3 - 880.1 8 - 880.6
4 - 882.6 9 - 879.1
5 - 880.2 10 - 870.7 with 1400 psi left
Again, this is all initial testing after the assembly and more field testing is required to get the gun dialed in. There are more options or ways that i could go with this gun. 1 is, the barrel (24") comes to the end of the shroud therefor the shroud is just for looks for now. I could shorten the barrel by 4" and install a baffle system into the shroud but, i would loose roughly 60 FPS. I could switch to a lighter pellet than the 18 gr JSB's like the 14.3 grain Croman Premiers to gain the speed back but, as i've said, i've got a ton of testing to do yet to this gun so, time will tell. In saying that, my end results with this rifle just could be to cut the barrel down, then install baffles, then switch to a lighter pellet at the same set velocity of 880 fps but adding a few more shot. The future will tell.
*NOTE: 880 fps is for testing/theory purposes. I will not get into that speed designation # at this time.
Here's a video of me putting the gun together. ENJOY!!:
STAY TUNED!!
Friday, May 13, 2011
Shoebox compressor future looking promising
Today marked my 3rd fill with my new shoebox 4500 psi compressor. Filling or "TOPPING OFF" my carbon fiber tank is both easy and very convenient to say the least. The one thing that i'm enjoying the most is the freedom of not relying on scuba shops and the time that it takes to drop the tank off and then go back and pick the tank up at a later time and date. With gas prices being what they are today, the shoebox is saving me MORE than just the top off cost of $5.00 that the local scuba shop charges to fill up my tanks. The other "Piece of mind" is that when you go to a scuba shop or sporting goods store to have your tanks topped off, you more than likely are not getting a FULL 4500 psi fill. You then later see the results in the field and by then, its too late. With this unit because of its low fill rate, the air going into the scuba tank stays cooler than the air used at a scuba shop. The scuba shop compressor fill much faster than the SB which creates more heat upon filling and so when the scuba tank cools, the pressure inside the vessel is much lower than when it was originally filled.
Today's top off of my 4500 psi carbon fiber tank took roughly 3+ hours and when the process started, my tank was down to exactly 3500 psi. The lowest of the 3 fills that i've done so far. My other 2 fills were from 3900-4500 psi the first time then 2800-4500 the second time. The 1000 psi top off took rough 3 hours to do with me running the SB for 1 hr then stopping for 15 minutes..etc..etc..etc till the tank was full. My first fill took exactly 2 hours and my second fill took about 2.5 hours.
The times for today's fill went as following:
9:45an-10:46=3500-3800 psi
I went to lunch and ran erands and got back home at 3:15 pm. I went to the garage later to restart the fill and it was at 3:35pm.
3:35-4:45pm
3800-4150 psi
I then let the SB cool off for 30 minutes then resumed the rest of the fill. Letting the machine cool is not mentioned in the instruction pamphlet nor is it necessary. But i do it for peace of mind. This thing contains O-rings and seals and heat is the enemy of such items. The cooler they are, the better they perform.
5:15-6:30pm
4150-4500 psi
The SB is a great value and performs its job...PERIOD. This unit is still in its infant stages but for the money, it can't be beat. At another time much later, i will do another report or so on how the SB is performing and what upgrades and or repairs i've done....IF ANY.
Shoebox with the "TOP DOWN" ready to fill my 4500 psi Carbon Fiber tank:
Today's top off of my 4500 psi carbon fiber tank took roughly 3+ hours and when the process started, my tank was down to exactly 3500 psi. The lowest of the 3 fills that i've done so far. My other 2 fills were from 3900-4500 psi the first time then 2800-4500 the second time. The 1000 psi top off took rough 3 hours to do with me running the SB for 1 hr then stopping for 15 minutes..etc..etc..etc till the tank was full. My first fill took exactly 2 hours and my second fill took about 2.5 hours.
The times for today's fill went as following:
9:45an-10:46=3500-3800 psi
I went to lunch and ran erands and got back home at 3:15 pm. I went to the garage later to restart the fill and it was at 3:35pm.
3:35-4:45pm
3800-4150 psi
I then let the SB cool off for 30 minutes then resumed the rest of the fill. Letting the machine cool is not mentioned in the instruction pamphlet nor is it necessary. But i do it for peace of mind. This thing contains O-rings and seals and heat is the enemy of such items. The cooler they are, the better they perform.
5:15-6:30pm
4150-4500 psi
The SB is a great value and performs its job...PERIOD. This unit is still in its infant stages but for the money, it can't be beat. At another time much later, i will do another report or so on how the SB is performing and what upgrades and or repairs i've done....IF ANY.
Shoebox with the "TOP DOWN" ready to fill my 4500 psi Carbon Fiber tank:
Freshly filled 4500 psi tank ready to fill my 3000 psi Logun Solo .20 cal:
Stay TUNED!!
Tofazfou
Thursday, April 21, 2011
The SHOEBOX 4500 psi compressor
This is not only my first time using the SHOEBOX compressor, this is my first HPA compressor ever. The Shoebox compressor sells for $430.00 and can be purchased from http://www.shoeboxcompressor.com/. Once I got on the list, my progression up the "ORDER" ladder flowed like a river. From the time I put my name on the list, until the time I received the Shoebox, only a few weeks had passed.
I have to say that I'm very impressed with it thus far. My first time filling my carbon fiber tank went very smoothly, and it was very fun to watch the compressor in action. It's also nice knowing that I don't have to rely on scuba shops anymore, being that it cost money and time, and sometimes, the fills are not to a full 4500 psi. I've quite often had my CF (carbon fiber) tank refilled only to get into the field to find that the tank was at 42-4300 psi, and that is not what I paid for. Sometimes I even left my tank with the scuba shop over night so they could COMPLETELY fill it, not to mention the fact that I would use gas to drive there twice...once to drop the tank off and once to pick it up. That really made me sore.
My 1st experience with the Shoebox: I will try to keep this post short as my first fill was successful and the compressor is pretty new. If anyone has any questions, they can refer to the website posted above. Now, once I went to Harbor Freight to purchase parts to connect the Shoebox to the shop compressor (I will cover that later with pictures), I then contacted Joe Brancato at http://www.airtanksforsale.com/ to get the final piece to the puzzle. I needed a DIN 300 hose assembly to connect from the Shoebox to the CF tank. Once I received all the parts, I quickly and EASILY installed and assembled all parts to make the Shoebox work. I then grabbed my CF tank, hooked it up to the Shoebox, and started the fill. My 4500 psi CF tank was down to 3900 psi at the start of the fill.
A look at the parts to get the shoebox up and running:
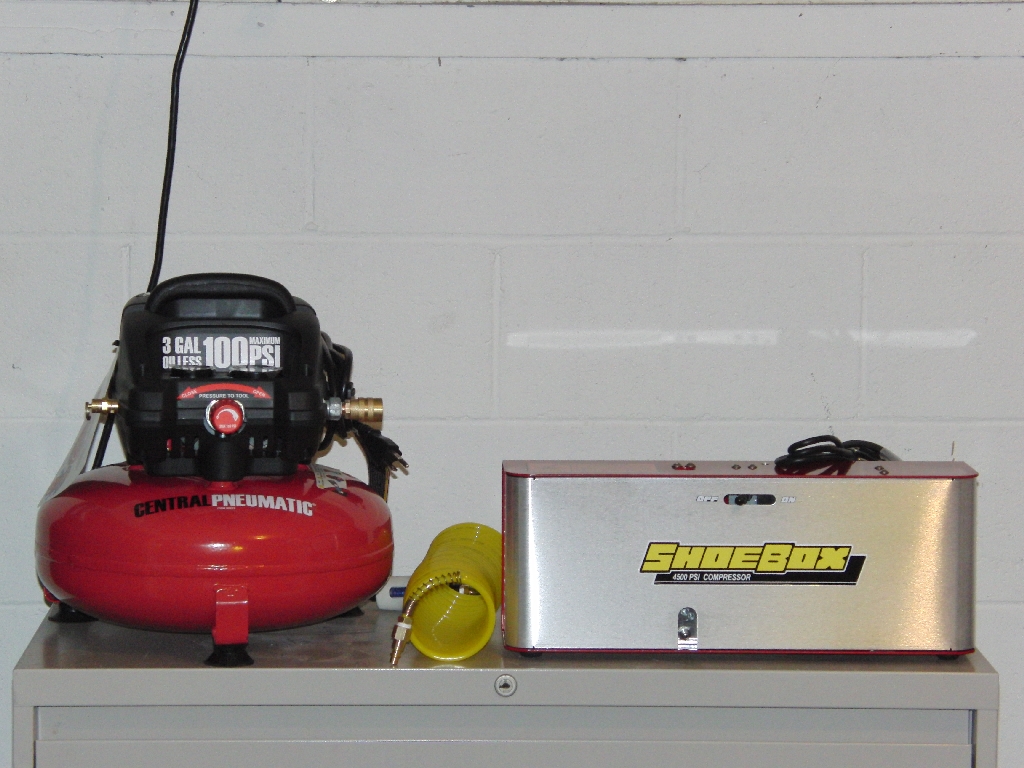
The Shoebox unit ($430.00)
Shoebox and 100 psi shop compressor ($59.00 and $430.00)
In-Line moister filter ($7.99)
Shop compressor hose ($5.99) and IL filter ($7.99) and brass 1/4" fittings ($4.99)
JB DIN 300 CF tank hose assembly ($181.00)
These are parts that come with the Shoebox, and instructions should be read on how to install them:
Also, the shipping box had very well written instructions and information on both the Shoebox, and its DAYTON 110 volt AC motor:
Lastly, I would like to include a video of my 1st experience with the Shoebox 4500 psi compressor:
I would like to thank Tom and Carol Kaye for such a wonderful quality product, as well as fast and friendly service.
I have to say that I'm very impressed with it thus far. My first time filling my carbon fiber tank went very smoothly, and it was very fun to watch the compressor in action. It's also nice knowing that I don't have to rely on scuba shops anymore, being that it cost money and time, and sometimes, the fills are not to a full 4500 psi. I've quite often had my CF (carbon fiber) tank refilled only to get into the field to find that the tank was at 42-4300 psi, and that is not what I paid for. Sometimes I even left my tank with the scuba shop over night so they could COMPLETELY fill it, not to mention the fact that I would use gas to drive there twice...once to drop the tank off and once to pick it up. That really made me sore.
My 1st experience with the Shoebox: I will try to keep this post short as my first fill was successful and the compressor is pretty new. If anyone has any questions, they can refer to the website posted above. Now, once I went to Harbor Freight to purchase parts to connect the Shoebox to the shop compressor (I will cover that later with pictures), I then contacted Joe Brancato at http://www.airtanksforsale.com/ to get the final piece to the puzzle. I needed a DIN 300 hose assembly to connect from the Shoebox to the CF tank. Once I received all the parts, I quickly and EASILY installed and assembled all parts to make the Shoebox work. I then grabbed my CF tank, hooked it up to the Shoebox, and started the fill. My 4500 psi CF tank was down to 3900 psi at the start of the fill.
A look at the parts to get the shoebox up and running:
The Shoebox unit ($430.00)
Shoebox and 100 psi shop compressor ($59.00 and $430.00)
In-Line moister filter ($7.99)
Shop compressor hose ($5.99) and IL filter ($7.99) and brass 1/4" fittings ($4.99)
JB DIN 300 CF tank hose assembly ($181.00)
These are parts that come with the Shoebox, and instructions should be read on how to install them:
Also, the shipping box had very well written instructions and information on both the Shoebox, and its DAYTON 110 volt AC motor:
Lastly, I would like to include a video of my 1st experience with the Shoebox 4500 psi compressor:
I would like to thank Tom and Carol Kaye for such a wonderful quality product, as well as fast and friendly service.
Monday, April 18, 2011
Ground Squirrel hunting with the .25 cal Predator pellets
FINALLY! After reviewing the local weather forecast, this weekend seemed like as good a time as any to finally test out the new .25 caliber Predator Poly-tip pellets made by Predator International. For those that are not familiar with these pellets, they are strictly a hunting pellet but they seem to have the accuracy also of match domed and flat head pellets. These pellets are available now for not only the .25 but for all small bore air rifle/pistol calibers (.177-.20-.22-.25). The Predator pellets have a hollow point head with a red polymer tip installed into hollow point cavity. Much the like of Nosler and Hornady center fire rifle bullets. .25 cal Predator pellets weigh in at 26 grains as my RCBS scale confirmed. The pellets are very uniform in shape and are very clean without a bunch of oil left on them from the factory. I've done nothing more than to open my 2 tins of pellets and dump them in one of my many screw on lid plastic containers and went shooting/hunting with them. Lets take a quick look at the pellets.
As i've said in a previous post, these pellets are consistently good in accuracy and performance from caliber to caliber. I've only shot them in .20-.22-and now .25 and they are not only accurate in all calibers, they are devastating on game. Here is a 1/2"+ group that i shot during my first outing with these pellets a couple of weeks ago and during this hunt, this group was easily duplicated.
After my initial sight in with the Predator pellets and then some informal target plinking with them, my confidence in these pellets jumped UP 10 fold. My guns main staple of ammo is the JSB Kings at 25.4 grs which are very accurate and i have to say, the new Predator pellets easily match the Kings accuracy performance with the added thump and terminal ballistics of a well designed HP/Poly-Tip. It was now time to hunt some ground squirrels.
SCENERY: These are simply scenery pics of were i shoot
The HUNT: After packing up and driving to my hunting area, i grabbed all my gear and started my walk through the forest of Oak trees and rock formations. I spotted my first GS (ground squirrel) sitting on top of a log and he busted me. He scurried down his hole and the minute he went down, i quickly tip toed into within 51 yards of him. After getting comfortable on the ground and perching my gun on top of a small rock, i grabbed my rangefinder (my bushnell that i recently found in the desert after being lost for 1.5 years, and it still WORKED...lol) and ranged the fallen log. It was exactly 50 yards. In about 4 minutes, there he was. Back up to see what and were i was located. I quickly turned on the camera, zoomed it in and hit record. On this shot though, i wanted to be safe and not miss cause this was my first animal taken with the new pellets. I played it safe and took a shoulder shot. The pellet landed with an authoritative THWOCK! I walked over to see if he made it down his hole or if he would be laying just outside of it, he was DADN (dead as a door nail) right there outside his hole. Success!! My first ground squirrel with the new Predator pellets....WOHOO! The second squirrel would come in at 61 yards and i made a very well placed head shot on him. Unfortunately, he was standing just outside his hole and when he toppled over at the impact, he landed right in his hole and went down a ways. I could clearly see blood around his hole were he fell over at the shot. GS #3 would come in at 75 yards exactly. I placed my second lower mildot dead center of his chest and gently squeezed the trigger. At the shot, i could hear that very familiar THWOCK sound that most all airguns make when the pellet connects to the game. He jumped and scurried down the rocks uncontrollably and i could definitely tell he was hit very hard. To my surprise after he reached the ground, he slowly killed over. After reaching him and turning him over, the pellet had impacted high on his chest and exited his back. Even though it was not a clean heart shot, i'm sure that pellet tore surrounded tissue in his chest near his heart and caused major internal hemorrhaging. The 4th GS and my most exciting and 2nd longest shot of the day came in at 72 yards. This little fella was perched atop a big rock and was basking in the plentiful sunlight. I fell to the ground were i spotted him and extended my bipod on my rifle to rest the gun. I ranged the GS to confirm distance and before i took the shot, i remembered that 1st, the wind was picking up and secondly, i was facing a totally different direction that i took the other GS' at. This time, the wind was blowing left to right as apposed to right to left like the other shots. Judging by the flowing green grass surrounding me, i could tell the wind was roughly 8-10 MPH and it would pick up a little then slow down a tad and would keep doing this but never completely dying down. By my calculations, the hold-over would be 2 mil dots up (elevation) and the use of the first mil dot on the right side (windage) of the cross hairs. This would be aiming the pellet into the wind and usually, a 5-10 MPH wind will use about one mil dot left or right of the cross hairs depending on the direction of the wind. As usual, i turned on my video camera and started to zoom in and record and on this shot, because it was so clear, i wanted the camera to capture all the action so i had to be as still as possible. At the shot, i felt really good about it and suddenly i heard the infamous THWOCK and in the scope, i could see a gray cloud of dust fly off of his head. I could also see that when he fell, his body was lifeless and that meant a PERFECT HEAD SHOT. Upon retrieving him, when i walked up to the boulder he was perched on, there was a pool of blood down the rocks and that was also good news. I found him about 3 ft behind the rocks and i was trying to figure out how he got so far behind them. In the video clip of the 4th GS at 72 yards, you can see the pellet in flight and it seems to have given off vapor trail during flight..lol. My 5th and final ground squirrel was taken at 49 yards and by then, the winds were probably close to 20+ MPH. But, I could not resist the temptation to test myself and my gun. Again, i held just left of his nose and i let the pellet fly. Again, the familiar THWOCK was a sure sign of a solid hit as well as his body falling seemingly limp. Another successful GS taken with the .25 predator pellets and my Theoben Rapid .25.
All in all, i am very pleased with Predator internationals Predator pellets. In my opinion, the 26 grain weight choice for the pellet was about perfect for the caliber. 26 grains should perform well in just about every kind of power source that is available for the .25 caliber airguns. These pellets simply work and there is no HP more accurate and deadly than these. When i say deadly, i'm still referring to the accuracy side of the potential of these pellets. Yes, other HP pellets expand as they should but none i've tested so far (i've shot em all) compare to the accuracy of these projectiles. The accuracy first and foremost is what makes "any" pellet DEADLY and the HP design/effects of these pellets are what makes these pellets the cream of the crop. Try em, hunt em, you will not be disappointed!
Lets take a look at the video of my hunt using the new 26 grain/.25 PREDATOR Poly-Tip Pellets:
As i've said in a previous post, these pellets are consistently good in accuracy and performance from caliber to caliber. I've only shot them in .20-.22-and now .25 and they are not only accurate in all calibers, they are devastating on game. Here is a 1/2"+ group that i shot during my first outing with these pellets a couple of weeks ago and during this hunt, this group was easily duplicated.
After my initial sight in with the Predator pellets and then some informal target plinking with them, my confidence in these pellets jumped UP 10 fold. My guns main staple of ammo is the JSB Kings at 25.4 grs which are very accurate and i have to say, the new Predator pellets easily match the Kings accuracy performance with the added thump and terminal ballistics of a well designed HP/Poly-Tip. It was now time to hunt some ground squirrels.
SCENERY: These are simply scenery pics of were i shoot
| Theoben Rapid .25 in HUNTING MODE |
The HUNT: After packing up and driving to my hunting area, i grabbed all my gear and started my walk through the forest of Oak trees and rock formations. I spotted my first GS (ground squirrel) sitting on top of a log and he busted me. He scurried down his hole and the minute he went down, i quickly tip toed into within 51 yards of him. After getting comfortable on the ground and perching my gun on top of a small rock, i grabbed my rangefinder (my bushnell that i recently found in the desert after being lost for 1.5 years, and it still WORKED...lol) and ranged the fallen log. It was exactly 50 yards. In about 4 minutes, there he was. Back up to see what and were i was located. I quickly turned on the camera, zoomed it in and hit record. On this shot though, i wanted to be safe and not miss cause this was my first animal taken with the new pellets. I played it safe and took a shoulder shot. The pellet landed with an authoritative THWOCK! I walked over to see if he made it down his hole or if he would be laying just outside of it, he was DADN (dead as a door nail) right there outside his hole. Success!! My first ground squirrel with the new Predator pellets....WOHOO! The second squirrel would come in at 61 yards and i made a very well placed head shot on him. Unfortunately, he was standing just outside his hole and when he toppled over at the impact, he landed right in his hole and went down a ways. I could clearly see blood around his hole were he fell over at the shot. GS #3 would come in at 75 yards exactly. I placed my second lower mildot dead center of his chest and gently squeezed the trigger. At the shot, i could hear that very familiar THWOCK sound that most all airguns make when the pellet connects to the game. He jumped and scurried down the rocks uncontrollably and i could definitely tell he was hit very hard. To my surprise after he reached the ground, he slowly killed over. After reaching him and turning him over, the pellet had impacted high on his chest and exited his back. Even though it was not a clean heart shot, i'm sure that pellet tore surrounded tissue in his chest near his heart and caused major internal hemorrhaging. The 4th GS and my most exciting and 2nd longest shot of the day came in at 72 yards. This little fella was perched atop a big rock and was basking in the plentiful sunlight. I fell to the ground were i spotted him and extended my bipod on my rifle to rest the gun. I ranged the GS to confirm distance and before i took the shot, i remembered that 1st, the wind was picking up and secondly, i was facing a totally different direction that i took the other GS' at. This time, the wind was blowing left to right as apposed to right to left like the other shots. Judging by the flowing green grass surrounding me, i could tell the wind was roughly 8-10 MPH and it would pick up a little then slow down a tad and would keep doing this but never completely dying down. By my calculations, the hold-over would be 2 mil dots up (elevation) and the use of the first mil dot on the right side (windage) of the cross hairs. This would be aiming the pellet into the wind and usually, a 5-10 MPH wind will use about one mil dot left or right of the cross hairs depending on the direction of the wind. As usual, i turned on my video camera and started to zoom in and record and on this shot, because it was so clear, i wanted the camera to capture all the action so i had to be as still as possible. At the shot, i felt really good about it and suddenly i heard the infamous THWOCK and in the scope, i could see a gray cloud of dust fly off of his head. I could also see that when he fell, his body was lifeless and that meant a PERFECT HEAD SHOT. Upon retrieving him, when i walked up to the boulder he was perched on, there was a pool of blood down the rocks and that was also good news. I found him about 3 ft behind the rocks and i was trying to figure out how he got so far behind them. In the video clip of the 4th GS at 72 yards, you can see the pellet in flight and it seems to have given off vapor trail during flight..lol. My 5th and final ground squirrel was taken at 49 yards and by then, the winds were probably close to 20+ MPH. But, I could not resist the temptation to test myself and my gun. Again, i held just left of his nose and i let the pellet fly. Again, the familiar THWOCK was a sure sign of a solid hit as well as his body falling seemingly limp. Another successful GS taken with the .25 predator pellets and my Theoben Rapid .25.
All in all, i am very pleased with Predator internationals Predator pellets. In my opinion, the 26 grain weight choice for the pellet was about perfect for the caliber. 26 grains should perform well in just about every kind of power source that is available for the .25 caliber airguns. These pellets simply work and there is no HP more accurate and deadly than these. When i say deadly, i'm still referring to the accuracy side of the potential of these pellets. Yes, other HP pellets expand as they should but none i've tested so far (i've shot em all) compare to the accuracy of these projectiles. The accuracy first and foremost is what makes "any" pellet DEADLY and the HP design/effects of these pellets are what makes these pellets the cream of the crop. Try em, hunt em, you will not be disappointed!
Lets take a look at the video of my hunt using the new 26 grain/.25 PREDATOR Poly-Tip Pellets:
STAY TUNED!!!
Subscribe to:
Posts (Atom)